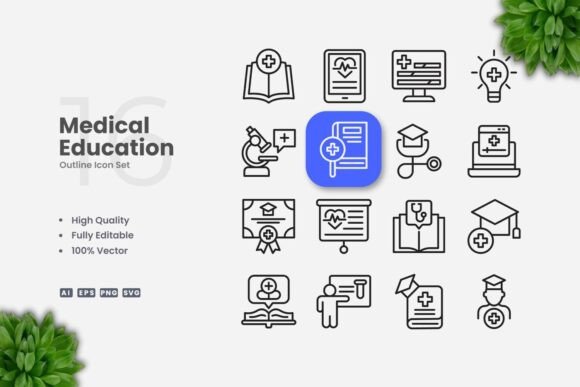
Medical Education Outline Icons: Streamlining Visual Communication in Learning Materials
Clear, consistent visuals are a cornerstone of effective medical education. Whether you're developing e-learning modules, designing infographics for patient education, or building a medical app interface, the right icon set can transform complex information into instantly recognizable cues. Medical Education Outline Icons offer a simple, clean design language that works across print, digital, and social media without overwhelming the viewer. But beyond their visual appeal, these vector assets become a powerful tool when integrated thoughtfully into your creative or instructional workflow. This article explores how to prepare, implement, and maintain such icons so they enhance your projects from start to finish.
Understanding the Role of Outline Icons in Medical Education
Outline icons, by their nature, are minimal. They strip away unnecessary detail, leaving only the essential silhouette. In a medical context—where precision matters but visual clutter can hinder learning—this clarity is invaluable. Medical Education Outline Icons typically cover anatomy, clinical procedures, medical equipment, health symbols, and patient care scenarios. Because they are vector-based, they scale perfectly from a small button on a mobile app to a full-page poster without pixelation. This versatility is why educational publishers, course creators, and healthcare marketers consistently return to outline icon sets as foundational design elements.
Consider the workflow of building a digital anatomy module. Instead of commissioning custom illustrations for every body part or tool, you start with a unified icon library. The consistent stroke weight, rounded corners, and open shapes create a cohesive visual language. This reduces cognitive load for learners: they focus on the concept, not on deciphering varied illustration styles. The icons serve as anchors—pointing to key terms, highlighting locations, or representing functions in a process diagram.
Before You Start: Preparation and Software Setup
Successful integration of Medical Education Outline Icons begins long before you drop them into a design file. Preparation involves understanding the file formats provided and ensuring your software can handle vector editing without conversion issues.
File Types and Their Uses
Most comprehensive icon sets include multiple formats. The typical package contains an editable AI source file (Adobe Illustrator), EPS Version 10 (compatible with older Illustrator versions and many other vector programs like CorelDRAW), SVG (scalable vector graphics for web and app development), and PNG with transparency (for quick use in presentations or social media where vector editing isn’t practical). A Readme.txt file is also included to outline licensing and usage tips.
Before starting, open the AI or EPS file in your preferred vector software. Look for the global color swatch or stroke settings. Because the icons have editable strokes, you can adjust the weight (e.g., from 2pt to 3pt) across all icons at once if the file is well-organized, typically using a global style or layer structure. If you plan to use them in a web project, export individual SVGs and ensure they have a consistent viewBox for alignment.
Organizing Your Icon Library
Efficiency matters when you’re dealing with 100 or more icons. Create a folder structure that mirrors your project categories: for example, “Anatomy,” “Equipment,” “Procedures,” “Patient Safety.” Within each folder, rename SVG or AI files with meaningful identifiers (e.g., “heart-anatomy-outline.svg”). This upfront organization saves time during later stages, especially if multiple team members are accessing the same assets. If you use a digital asset manager (DAM) or a cloud storage system, tag each icon with relevant keywords for quick search.
Integrating Icons into Your Project Workflow
The true power of Medical Education Outline Icons emerges when they are embedded into a repeatable process. Whether you are working on a single poster or a series of e-learning modules, treat the icons as modular components that can be reused and repurposed.
Pre-Project Planning: Wireframing and Storyboarding
During the early conceptual phase, outline icons function as placeholders. Open the EPS or AI file and drag icons directly into your wireframe. Because the stroke is clean, they won’t distract from the layout structure. Use them to represent where illustrations or symbols will go, and test different positions for visual hierarchy. For example, if you’re building a poster about hypertension management, place a heart icon next to the blood pressure section and a pill icon near medication reminders. This rapid prototyping helps stakeholders visualize the final product without needing final art.
During Production: Consistent Styling Across Assets
Once the layout is approved, you move into implementation. Here, consistency is critical. Use the same icon set across all materials for a single course or campaign. If you need to change color to match a brand palette, vector software allows batch editing. In Illustrator, you can select all icons and apply a new stroke color or fill. Because these are outline icons, avoid fills unless specifically desired—maintaining an outline-only style reinforces a unified, clean aesthetic.
Icons can also be combined to create compound symbols. For instance, a syringe icon placed over a map location can denote a vaccination site. When you layer icons, ensure the stroke weights remain identical; otherwise, the visual harmony breaks. The editable stroke feature means you can adjust all icons to a consistent 2.5pt weight if that suits your medium—thicker for print, thinner for digital screens.
Post-Project Repurposing and Updates
Medical education is never static—guidelines change, new procedures emerge. With vector icons, updating your materials becomes straightforward. Instead of redrawing an entire diagram, you swap or modify individual icons. The SVG format is particularly useful for interactive web content: you can change icon color via CSS on hover or toggle states. The PNG transparency versions are a fallback for email newsletters or platforms that don’t support SVG. By maintaining the original source file (AI or EPS) as your master, you can export fresh PNGs at different resolutions whenever needed.
Practical Implementation Tips for Different Media
Different use cases demand subtle variations in how you apply the icons. Here are actionable guidelines for the most common scenarios:
Print Design (Flyers, Posters, Banners)
- Use the EPS or AI source file. Set your document to CMYK color mode if printing commercially. Outline icons with thin strokes (1–2pt) work well for flyers viewed up close; for large banners viewed from a distance, increase stroke weight to 3–4pt for visibility.
- Keep white space around each icon—avoid crowding them against text or other graphics. The clean design works best when it can breathe.
- For consistent reproduction, flatten icons to outlines only (no fill) when exporting to PDF/X-1a. This ensures no unexpected color shifts.
Digital and Web (Apps, Websites, Infographics)
- Use SVG for responsive screens. Because Medical Education Outline Icons already have uniform stroke geometry, you can embed them inline in HTML and style with CSS: change color, size, and even add animations (e.g., a pulsing heartbeat icon for a vital signs module).
- When exporting for mobile apps, consider the touch target size. A 24x24px icon may be too small; scale to 48x48px and adjust stroke weight accordingly. The vector source makes this scaling trivial.
- For infographics, use icons as visual anchors in step-by-step processes. Align them consistently left or center, and keep the same icon-to-text spacing throughout.
Social Media and Presentations
- For quick social graphics, use the included PNG files. They have a transparent background, so they layer neatly over colored backgrounds or photos. Pair them with a bold sans-serif font for a modern medical aesthetic.
- In slide presentations, insert icons as scalable vector objects (if possible). Avoid resizing raster PNGs beyond their original resolution. If you only have PNGs, insert them at 100% and use the largest version provided to maintain sharpness.
Ensuring Consistency and Long-Term Quality Control
One of the biggest challenges in medical education design is maintaining a consistent look across dozens of assets produced months apart. With a dedicated icon set, you build a visual system. To enforce consistency:
- Create a style guide that specifies the icon stroke weight, corner radius, color palette (if any), and minimum size. Reference the guide every time you use the icons.
- Standardize icon usage. For example, always use the “stethoscope” icon for auscultation, never a generic sound wave. This builds trust with your audience.
- Audit periodically. After a project, check that all icons used are from the same set and that no stray modifications altered the stroke weight or alignment. The source AI file serves as the single source of truth—always revert to it when in doubt.
Quality control also extends to file management. Keep the original download package intact in a secure location. If you modify icons (e.g., rotate, combine, or add text), save those variants in a separate “modified” folder to avoid contaminating the original pool. The Readme.txt often contains license information; review it to understand permissible modifications and redistribution limits.
Making the Most of a Vector Icon Investment
For professionals in healthcare communication, an outline icon set is not a one-time download—it’s a reusable infrastructure. The initial effort spent on cataloging, naming, and testing pays dividends every time you start a new project. Because these icons have editable strokes and fill, you can adapt them to evolving brand colors or platform requirements without starting from scratch. The 100-vector count in Medical Education Outline Icons typically covers a broad enough range for core medical subjects, and the scalable nature means you can pair them with additional sets later if needed—just ensure stroke weights match.
When planning quarterly content (e.g., patient education handouts, webinar slides, social media awareness campaigns), block an hour to pre-configure a few icon variations: a black stroke version for print, a blue stroke for web, a white stroke for dark backgrounds. Export these as SVG and PNG sets, and store them in your project folder. This small process step eliminates repetitive editing later and keeps your workflow fluid.
Anticipating Common Workflow Pitfalls
Even with a well-prepared icon set, some issues arise. Here are solutions to the most frequent obstacles:
- Stroke weight variation after resizing: If you scale an icon up 200%, the stroke becomes proportionally thicker. To avoid this, use vector software that can scale strokes independently (e.g., Illustrator’s “Scale Strokes & Effects” checkbox). For static prints, decide on a target size and export at that exact scale.
- Loss of crispness on low-res screens: PNG files are fixed resolution. If your website uses retina displays, provide @2x versions (double dimensions) or stick to SVGs, which are resolution-independent.
- Inconsistent alignment: Some icons may contain slight misalignments in the original file—run a “Align to Pixel Grid” command (Illustrator) or use snapping to clean up edges. This is especially important for UI where icons sit next to text.
The clean, outline style of these icons also requires careful contrast. On light backgrounds, a dark stroke works best; on dark backgrounds, a light stroke. Since the set offers editable stroke colors, you can invert them in seconds. Always test the final output on the actual medium—whether it’s a projected slide or a printed brochure—to ensure the icon remains legible at intended sizes.
Building a Reusable Workflow with Medical Education Outline Icons
To sum up the practical process: start by organizing your files, then use the icons as placeholders during planning. During production, rely on the vector formats for scalability and on the style guide for consistency. After the project, archive the source file and note any customizations. With this approach, Medical Education Outline Icons become more than a design asset—they become a reliable component of your creative system. Whether you’re a solo blogger creating an infographic about vaccine schedules or a corporate marketing team developing a suite of e-learning modules for nurses, the same principles apply: prepare, implement consistently, and reuse strategically. The result is professional, cohesive visual communication that saves time and enhances learning outcomes.